Setting up the Recruitee integration
In this guide you will know how to fully configure your Recruitee integration with Brainner.
*Note: You must be a team or organization with admin rights in Brainner and Super Admin rights in Recruitee to install this integration.
1. Log in to your Brainner account.
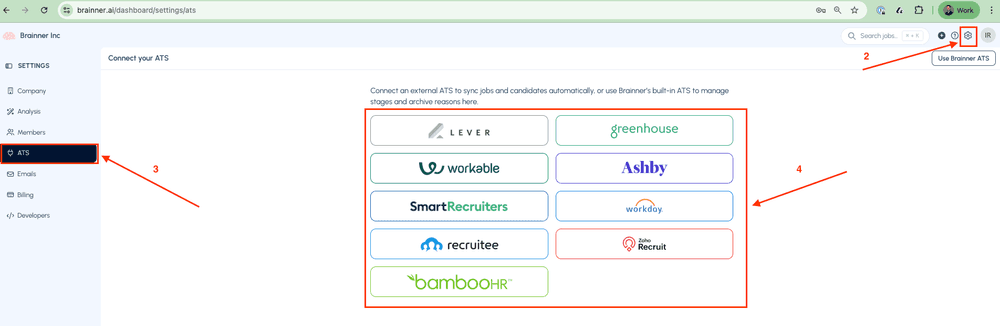
2. Click Settings on the top right corner.
3. Click on the ATS tab.
4. Select Recruitee from the list of integrations.
5. Go to Recruitee and click Settings
6. Click on Personal API Tokens in the left menu.
7. Click on +New Token
8. Enter 'Brainner' as the name and click Save.

9. Copy the Company ID
10. Copy the Token

11. Move to Brainner and paste the Company ID
12. Paste the Token and click Connect

- Congratulations! The connection between Brainner and Recruitee is active!
There are still a few quick steps we will need you to take to configure Recruitee for this integration.
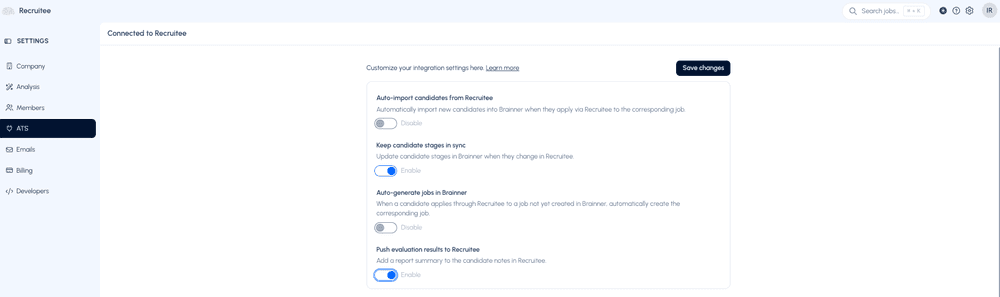
13. In https://www.brainner.ai/dashboard/settings/ats, toggle the options:
- 'Keep candidate stages in sync' to automatically reflect any stage changes made to candidates in Recruitee directly in Brainner.
- “Push evaluation results to comments” if you would like to add a summary of the results to the candidate’s comments in Recruitee.
14. Click on Save Changes
15. A window will open. Copy the URL that you will find there:

16. Move to Recruitee and click on Settings > Webhooks
17. Click on New Webhook

18. Enter the Name
19. Post the URL copied in step 15
20. Select the options: Candidate created, Candidate assigned and Move on pipeline
21. Click on Verify and Create

22. In Brainner, click Done

- Congratulations! The integration between Brainner and Recruitee is ready!