Setting up the Workday integration
Prerequisites
1. Make sure you have admin access to your Workday account before getting started.
2. Once logged in to Workday, use the search bar to look up "View API Clients".
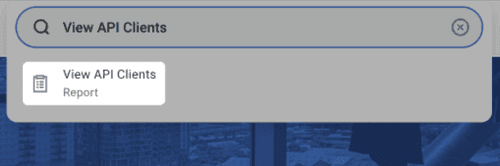
*If this option does not appear in the search results, your account does not have admin privileges.
3. In that case, identify your organization's Workday Administrator and either request the necessary permissions or ask them to complete the integration setup on your behalf.
Overview
Estimated setup time: 30 minutes.
The integration requires completing four main steps:
1. Create a dedicated integration system user and a corresponding security group.
2. Assign the required permissions to that security group and apply the changes.
3. Generate an API client to establish the connection.
4. Enter the information in Brainner
The sections below provide a detailed walkthrough of each step.
Find Your Workday Service URL
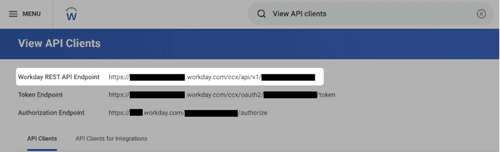
1. Click the "Search" bar at the top of the page and type "View API Clients".
2. Select the "View API Clients" task from the results.
3. On the page that loads, locate and copy the "Workday REST API Endpoint" displayed at the top.
The URL typically follows this pattern: https://wd3-impl-services1.workday.com/ccx/service/{company}/Recruiting/v45.2
Add an Integration System User (ISU)
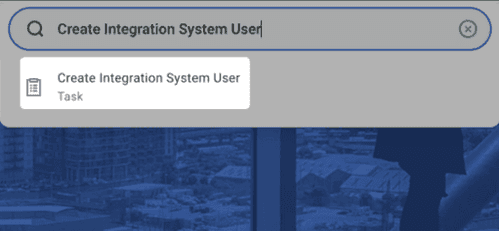
1. In the "Search" bar, type "Create Integration System User" and select the matching task.
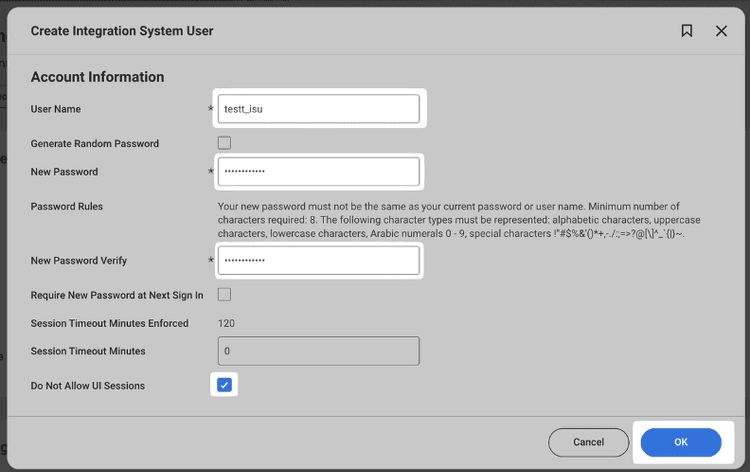
2. In the dialog that opens, enter a username and set a secure password.
For security purposes, it is recommended to check the box labeled "Do Not Allow UI Sessions". All other fields can remain as-is.
3. Click "OK" to confirm.
Create a Security Group and Assign the ISU
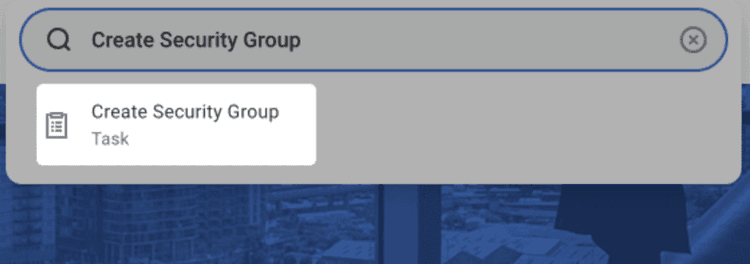
1. Search for "Create Security Group" and select the task from the results.
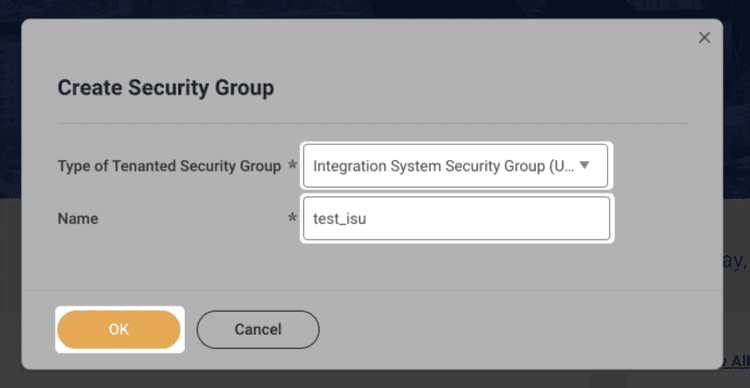
2. On the page that appears, open the "Type of Tenanted Security Group" dropdown and choose "Integration System Security Group (Unconstrained)".
3. In the "Name" field, enter the same username used when creating the ISU (e.g., test_isu).
4. Click "OK".
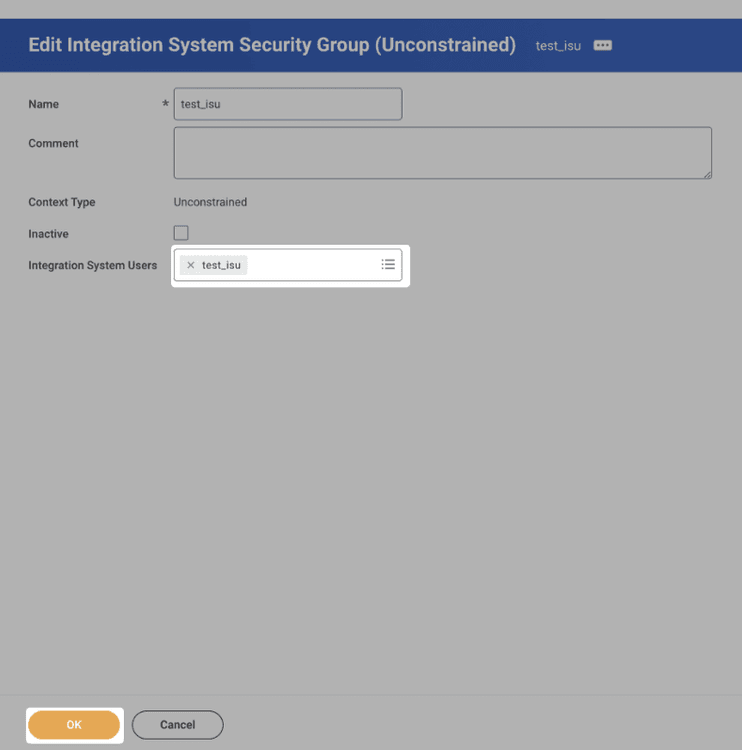
5. On the following page, find the "Integration System Users" field and add the ISU you just created by typing its name and selecting it.
6. Click "OK" to save.
Add the Required Permissions to the Security Group
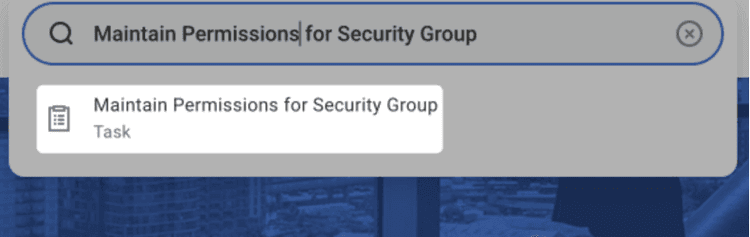
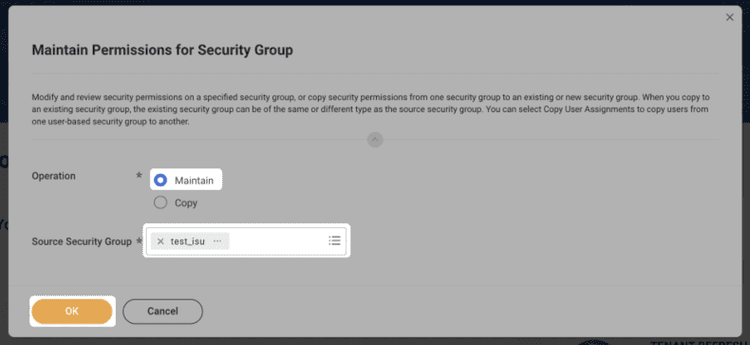
1. Search for "Maintain Permission for Security Group" and select the task.
2. In the window that appears, confirm that the "Maintain" option is selected.
3. Click the "Source Security Group" field, type the name of the group you created, and select it from the results.
4. Click "OK".
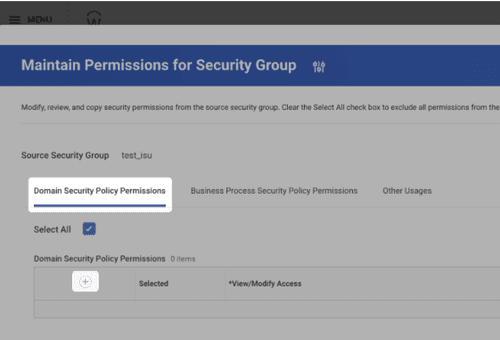
5. You will now see a screen where you can add the permissions for the ISU. The exact list of required permissions will be displayed within the Brainner connection flow.

The permissions listed are for illustration only. Always refer to the permissions shown in the Brainner connection flow — those are the ones you need to grant.
For each permission, repeat the following steps:
1. Make sure the "Domain Security Policy Permissions" tab is active.
2. Click the "+" icon to add a new row.
3. As you're setting up the integration, you will be shown an exact list of permissions to grant to the security group. Below you can see an example - the permissions may vary in your case:
4. Please enter them into the table as follows:
- In the "View/Modify Access" column, select the appropriate value from the dropdown (e.g., "Get Only").
- In the "Domain Security Policy" column, type the policy name (e.g., "Manage: Location"), press Enter, and select the item that appears.
Activate Your Changes
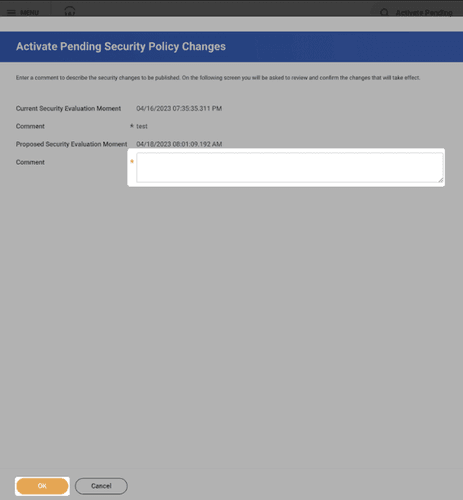
Any changes made to Workday security policy settings must be explicitly activated before they take effect.
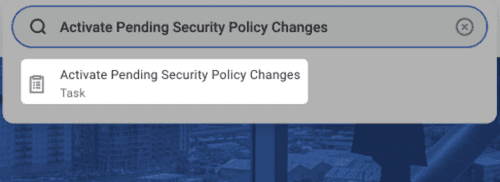
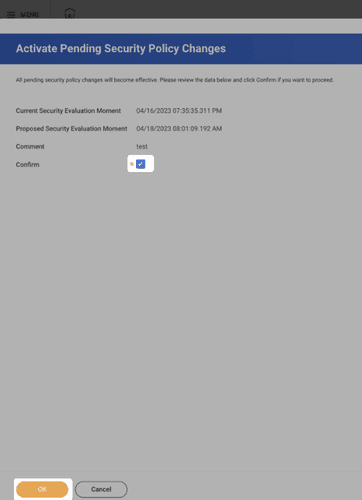
1. Search for "Activate Pending Security Policy Changes" and select the task.
2. Add a brief comment describing the change (e.g., "Grant ISU test_isu necessary permissions for Brainner integration").
3. Click "OK".
4. On the confirmation screen, check the "Confirm" box and click "OK".
Enter the information in Brainner
In this guide you will know how to fully configure your Workday integration with Brainner.
*Note: You must be a team with admin rights in Brainner and Admin rights in Workday to set up this integration.
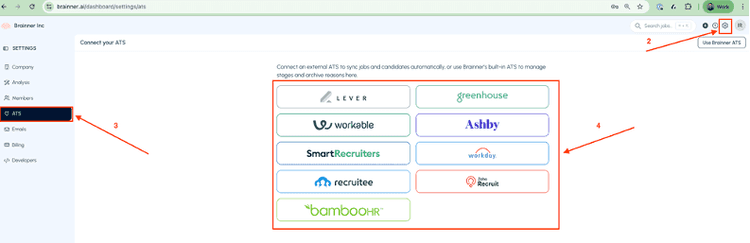
1. Log in to your Brainner account.
2. Click Settings on the top right corner.
3. Click on the ATS tab.
4. Select Workday from the list of integrations.
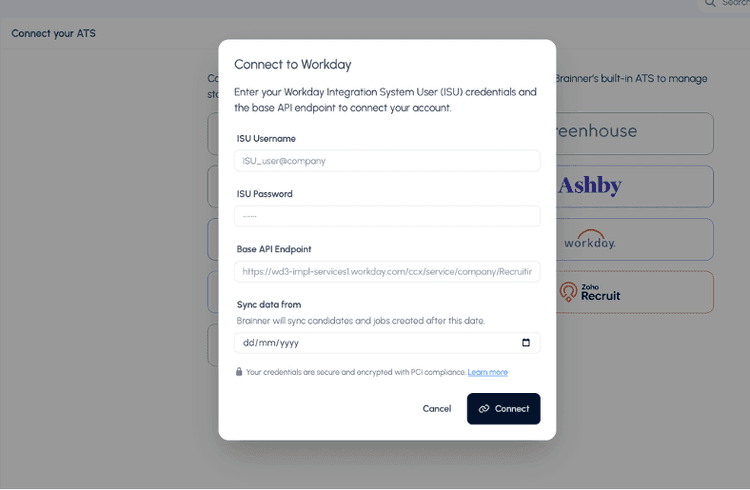
5. Enter the following fields and click connect:
If you have any questions, feel free to reach out to our team at support@brainner.ai