Setting up the Lever integration
In this guide you will know how to fully configure your Lever integration with Brainner.
*Note: You must be a team or organisation with admin rights in Brainner and Super Admin rights in Lever to install this integration.
1. Log in to your Brainner account.
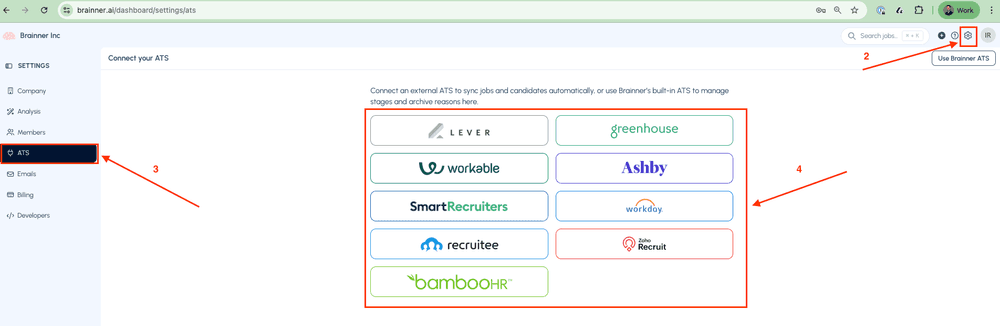
2. Click Settings on the top right corner.
3. Click on the ATS tab.
4. Select Lever from the list of integrations.
5. Sign-in to your Lever account to connect both platforms. Use your usual Lever credentials to log in and authorize the integration.

6. Click Accept to authorize the integration.
As you can see from the image below, Brainner will need these permissions to: import jobs, candidates and rejection reasons automatically from Lever, and post the results and update stages in the candidate’s profile in Lever.

- Congratulations! The connection between Brainner and Lever is active!
There are still a few quick steps we will need you to take to configure Lever for this integration.
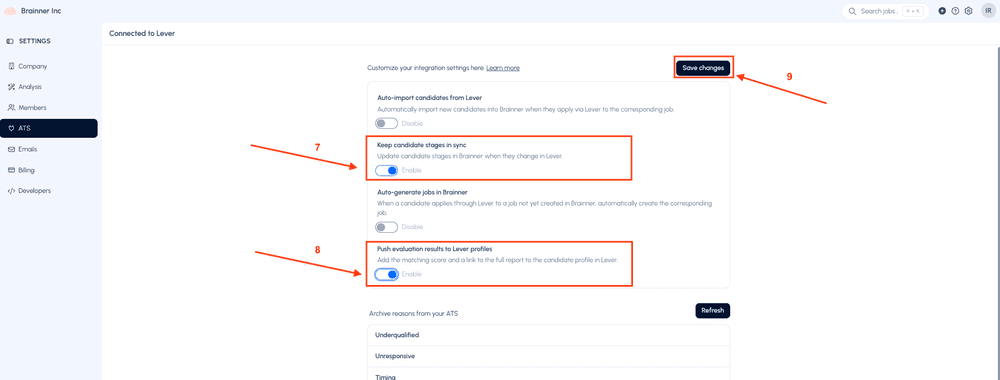
7. In https://www.brainner.ai/dashboard/settings/ats, toggle the option 'Keep candidate stages in sync' to automatically reflect any stage changes made to candidates in Lever directly in Brainner.
8. Enable “Push evaluation results to comments” if you would like to add a summary of the results to the candidate’s comments in Lever.
9. Click on Save Changes.
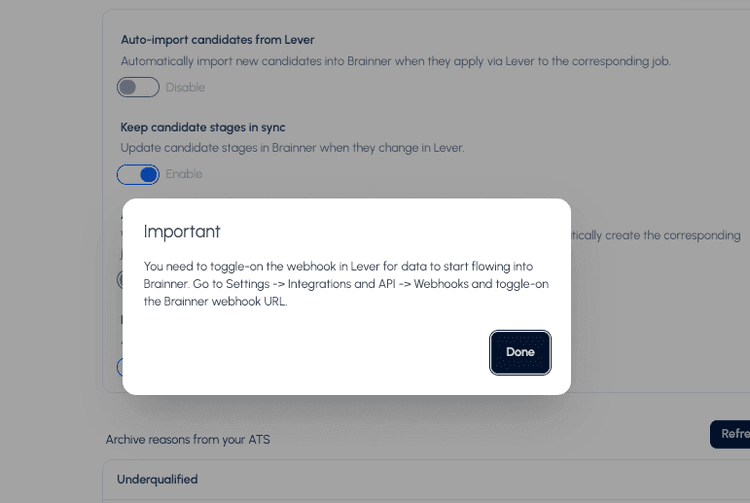
10. A window will open highlighting the next step, that is configuring the Webhook in Lever. A webhook is a technical term that describes the action of notifying the Brainner platform events automatically.
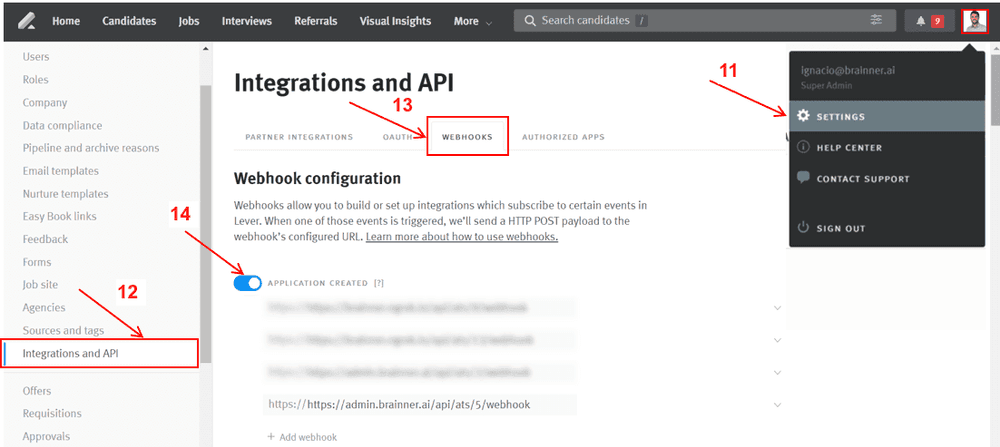
11. In Lever, go to Settings.
12. Click on Integrations and API on the left side menu.
13. Click on the Webhooks tab.
14. If they aren’t already enabled, turn on all options related to Brainner, including “Application Created,” “Candidate State Change,” “Candidate Archive Change,” etc.
If you have any questions, feel free to reach out to our team at support@brainner.ai