Setting up the Workable integration
In this guide you will know how to fully configure your Workable integration with Brainner.
*Note: You must be a team or organization with admin rights in Brainner and Admin rights in Workable to install this integration.
1. Log in to your Brainner account.
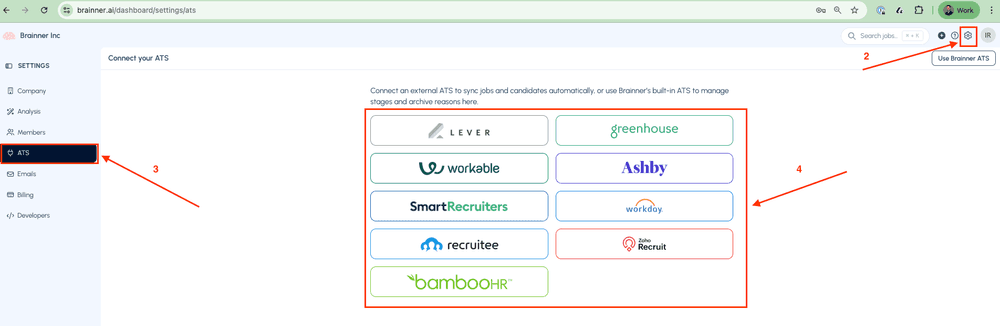
2. Click Settings on the top right corner.
3. Click on the ATS tab.
4. Select Workable from the list of integrations.
5. Go to Workable platform and click Settings
6. Click on Apps in the Integrations sections of the left menu.
7. Click on Generate API Token

8. Enter 'Brainner' as the name and select the following API Scopes: r_candidates, r_jobs, w_candidates and w_comments
9. Click Generate Token


10. Copy the Token

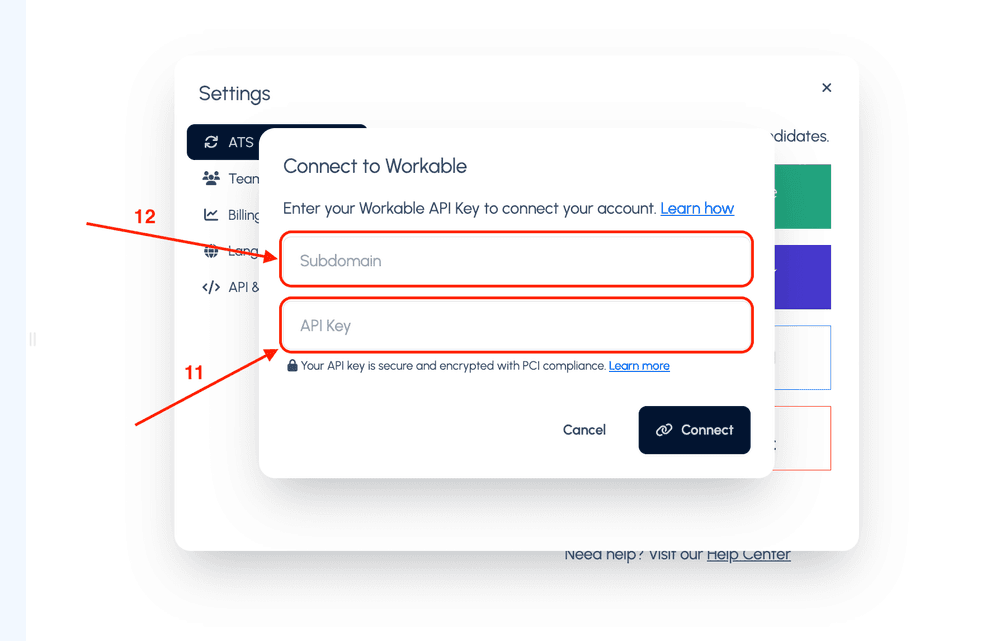
11. Go to Brainner and paste the API Token
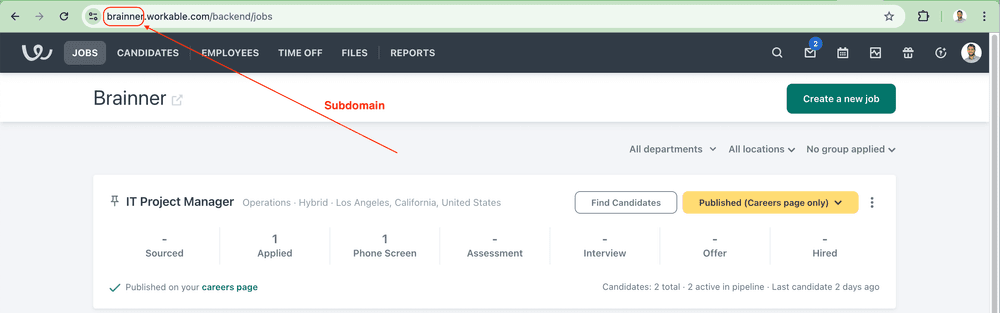
12. Enter the Subdomain associated with your Workable account (refer to the image below for guidance).
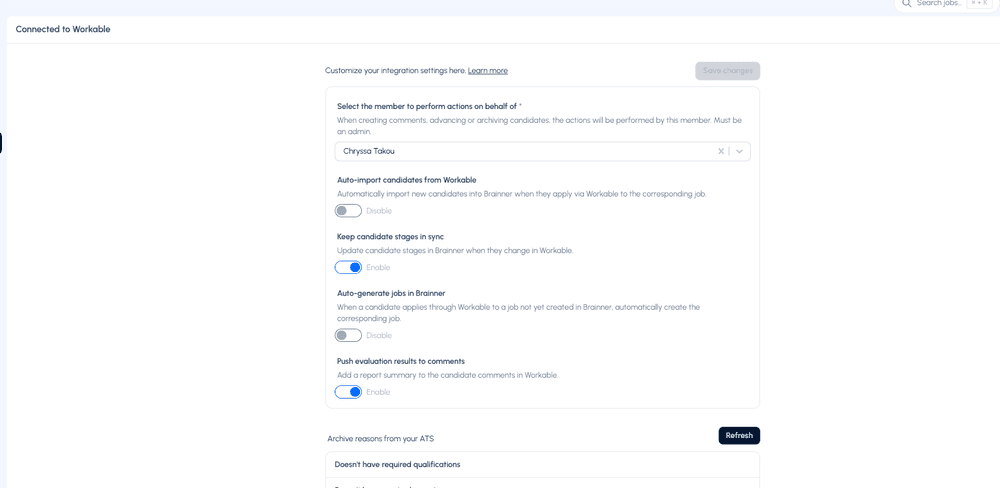
13. Select the member to perform actions on behalf of. All actions triggered by Brainner will be recorded under this member in Workable.
14. Toggle the option 'Keep candidate stages in sync' to automatically reflect any stage changes made to candidates in Workable directly in Brainner.
15. Enable “Push evaluation results to comments” if you would like to add a summary of the results to the candidate’s comments in Workable.
16. Click on Save Changes.
- Congratulations! The integration between Brainner and Workable is ready!
If you have any questions, feel free to reach out to our team at support@brainner.ai