How to Send Brainner Results to Ashby Custom Fields
What You Will Achieve
Once this setup is complete, every time Brainner finishes screening a candidate, the results will be automatically sent to the corresponding custom fields in their Ashby profile. This allows your team to filter candidates, trigger hiring automations, and make faster decisions without leaving Ashby.
Requirements Before You Start
Brainner Access
You need admin or settings access in Brainner to enable the ATS result-syncing options.
Ashby Access
You need admin access in Ashby to create and manage custom fields under the Admin panel.
Step-by-Step Setup
Step 1: Enable Result Syncing in Brainner
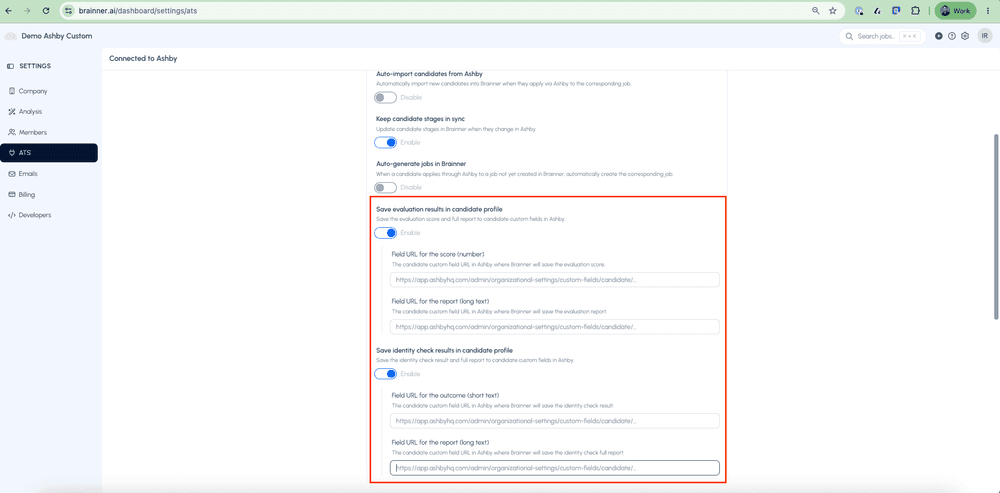
Go to brainner.ai/dashboard/settings/ats and enable the following options: "Save evaluation results in candidate profile" and "Save identity check results in candidate profile."
*Note: You can decide which information to send.
Step 2: Create the Evaluation Custom Fields in Ashby
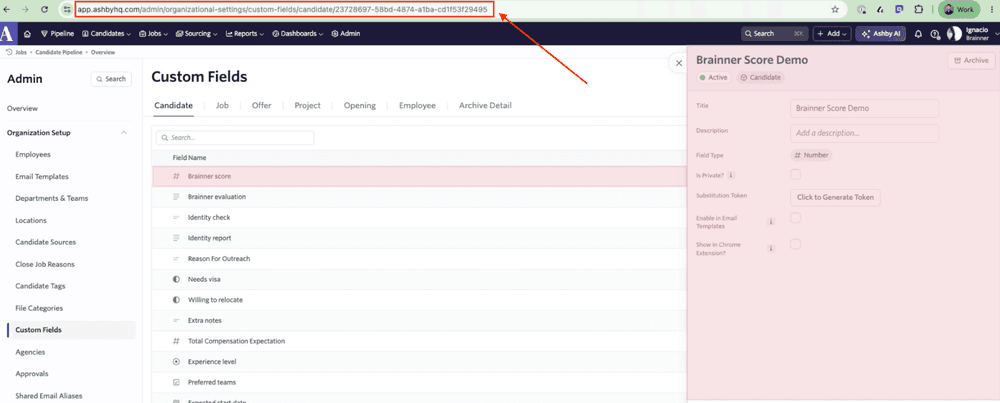
In Ashby, go to Settings, then Admin, then Custom Fields. Create the corresponding new fields:
Resume Screening
- Brainner Score - set the field type to Number.
- Brainner Evaluation - set the field type to Long Text.
Identity Check
- Brainner Identity Check - set the field type to Short Text.
- Brainner Identity Report - set the field type to Long Text.

Step 3: Paste Custom Fields URL in Brainner
After creating each field, copy and paste each field's URL into the matching fields in Brainner.
Step 4: Save and Verify
Click Save Changes in Brainner. To verify, import new candidates in Brainner, once processed, open the candidate profile in Ashby and confirm the custom fields are visible and populated with Brainner data.
What You Will See in Ashby
Once configured, each candidate profile in Ashby will display the Brainner Score, the full evaluation report, and the identity check status and report as separate fields. You can use these to build automations, apply filters across candidate pipelines, and standardize your hiring decisions.
Need Help?
Contact your Customer Success Manager or reach out to our support team at support@brainner.ai.
Frequently Asked Questions
Learn more about Brainner
No, the order does not affect the final result. However, we recommend enabling the options in Brainner first so you know exactly which fields you need to create in Ashby before copying and pasting the URLs.
That is perfectly fine. The evaluation and identity check fields are independent. You can enable only "Save evaluation results in candidate profile" in Brainner and skip the identity check custom fields in Ashby entirely. The same happens the other way around.
No. The sync only applies to candidates screened after the configuration is saved. To see Brainner data in Ashby, import and process new candidates following the setup.
Use the exact field types described in this tutorial: Number for the Brainner Score, Long Text for the Brainner Evaluation report, Short Text for the Identity Check result, and Long Text for the Identity Check report. Using a different type may cause the data to not display correctly.
First, double-check that the URLs copied from Ashby are correctly pasted into each corresponding field in Brainner, and that you clicked Save Changes. If the issue persists, contact your Customer Success Manager or reach out to our support team at support@brainner.ai.
Still have questions?
Book a demo or .